If you’re searching for how to dismantle a gaming chair, you’re likely planning to move, store, repair, or replace parts of your chair. Gaming chairs are built for comfort and durability, which also means they can feel complicated to take apart. The good news is that dismantling a gaming chair is completely manageable with the right steps, tools, and precautions.
This professional, Google-friendly guide walks you through the entire dismantling process in a clear and practical way. It avoids unnecessary repetition, follows proper heading structure, and is written to support fast indexing and strong search visibility—without keyword stuffing.
Why You Might Need to Dismantle a Gaming Chair
Before starting, it’s useful to understand why dismantling is often necessary.
Common reasons include:
- Moving to a new location
- Shipping or storing the chair
- Replacing damaged parts
- Deep cleaning
- Adjusting or repairing the mechanism
No matter the reason, following a structured approach helps prevent damage and keeps all components intact.
Tools Required to Dismantle a Gaming Chair
Basic Tools You’ll Need
Most gaming chairs are assembled using standard hardware. Prepare the following tools before you begin:
- Allen key (usually included with the chair)
- Adjustable wrench or spanner
- Flathead screwdriver
- Phillips screwdriver
- Rubber mallet (optional)
- Protective gloves
- Small container for screws and bolts
Understanding Gaming Chair Components
Before dismantling, it’s important to recognize the main parts of a gaming chair.
Main Components
- Headrest and lumbar cushions
- Backrest
- Seat base
- Armrests
- Tilt and height adjustment mechanism
- Gas lift cylinder
- Wheelbase and casters
Knowing how these pieces connect will make dismantling easier and safer.
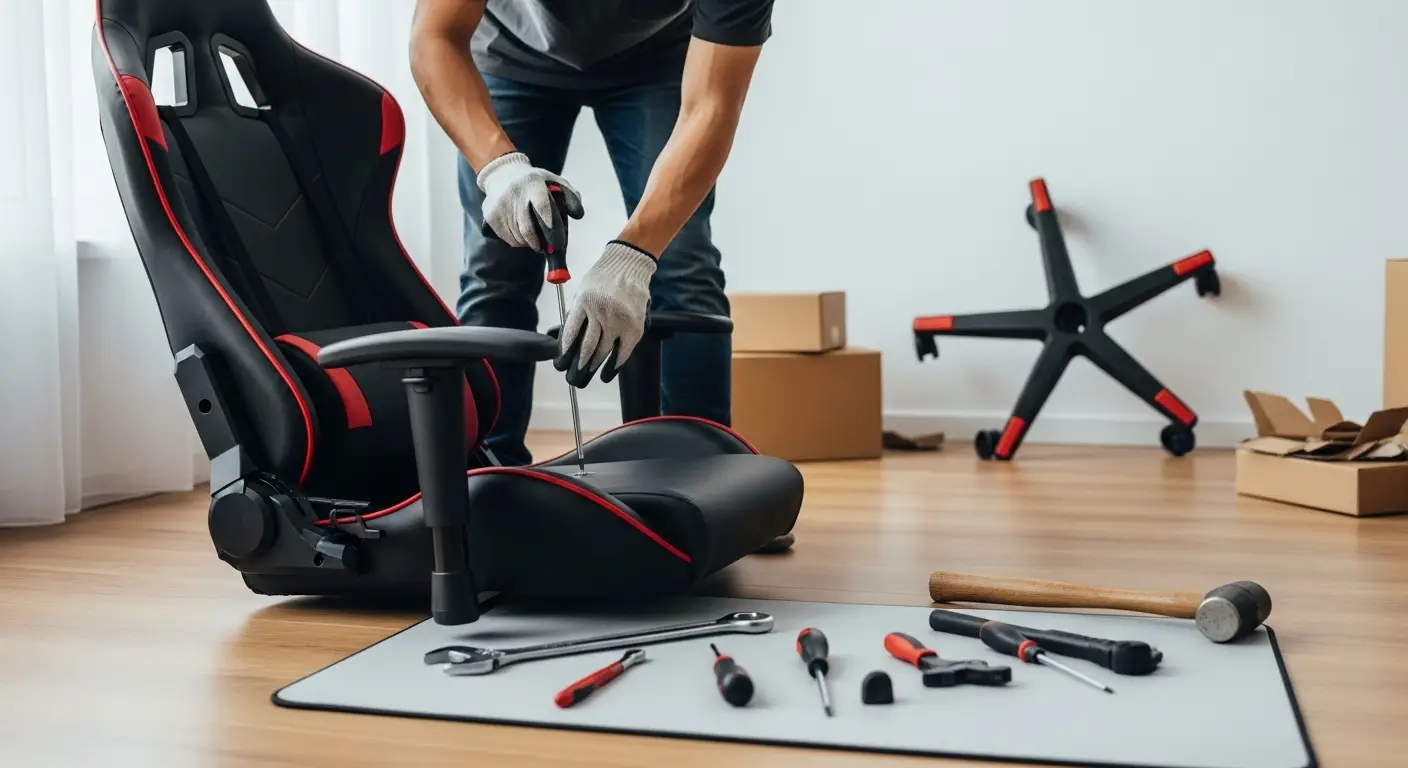
How to Dismantle a Gaming Chair Step by Step
Step 1: Remove Cushions and Accessories
Start with the simplest parts.
- Detach the headrest and lumbar support cushions.
- Unclip or untie any straps holding them in place.
- Set cushions aside in a clean, dry area.
This clears access to the main structure and prevents damage.
Step 2: Detach the Backrest from the Seat
This step usually requires an Allen key.
How to Do It
- Tilt the chair slightly forward.
- Locate the bolts connecting the backrest to the seat frame.
- Support the backrest with one hand.
- Loosen and remove the bolts carefully.
Once detached, place the backrest flat to avoid bending the frame.
Step 3: Remove the Armrests
Armrests are usually attached to the underside of the seat.
Instructions
- Flip the seat upside down.
- Identify the bolts securing each armrest.
- Unscrew them evenly to prevent stress on the frame.
- Remove armrests one at a time.
Keep left and right armrests labeled if they are not identical.
Step 4: Detach the Tilt Mechanism
The tilt mechanism is the metal plate under the seat.
Steps
- Turn the seat upside down.
- Locate the four main bolts holding the mechanism.
- Use an Allen key or wrench to loosen them.
- Carefully lift the mechanism away from the seat.
This part may feel heavy, so handle it with care.
Step 5: Remove the Gas Lift Cylinder
This is often the most challenging step.
Safe Removal Method
- Turn the chair upside down.
- Firmly hold the wheelbase.
- Use a rubber mallet to tap around the base of the gas lift cylinder.
- Apply steady pressure until it loosens.
Avoid using excessive force, as this can damage the cylinder or base.
Step 6: Remove the Wheelbase and Casters
Once the gas lift is removed, the wheelbase comes off easily.
Final Steps
- Pull the wheelbase away from the cylinder.
- Casters can be pulled out by hand or gently pried out with a screwdriver.
- Store wheels together to avoid losing them.
At this point, the chair is fully dismantled.
Common Mistakes to Avoid When Dismantling a Gaming Chair
Using Excessive Force
If a part won’t come loose, double-check for hidden screws instead of forcing it.
Losing Screws and Bolts
Always store fasteners in a labeled container.
Ignoring Safety
Wear gloves and keep fingers clear of pressure points, especially near the gas lift.
Skipping Documentation
Taking photos during dismantling helps with reassembly later.
Tips for Storing or Transporting Chair Parts
Proper storage prevents damage and makes reassembly easier.
Best Practices
- Wrap metal parts in cloth or bubble wrap
- Keep screws taped to their matching parts
- Stack components flat to avoid bending
- Store in a dry, dust-free area
These steps are especially useful if the chair will be disassembled for an extended time.
How to Reassemble a Gaming Chair Easily
Reassembly is simply the reverse of dismantling.
Helpful Reassembly Tips
- Follow photos taken during dismantling
- Tighten bolts gradually, not all at once
- Ensure the gas lift is fully seated
- Test adjustments before full use
Taking your time ensures stability and comfort.
Maintenance Tips to Reduce Future Dismantling
Regular care can reduce the need to dismantle your chair frequently.
Maintenance Checklist
- Tighten screws every few months
- Clean casters and moving parts
- Avoid exceeding weight limits
- Lubricate metal joints if needed
Routine maintenance extends the life of your gaming chair.
Frequently Asked Questions
Is It Safe to Remove the Gas Lift Cylinder?
Yes, if done carefully. Never puncture or heat the cylinder.
How Long Does It Take to Dismantle a Gaming Chair?
On average, 20–40 minutes for beginners.
Can I Dismantle a Chair Without Tools?
Most chairs require tools, especially for bolts and mechanisms.
Final Thoughts
Learning how to dismantle a gaming chair doesn’t require professional skills—just patience, the right tools, and a step-by-step approach. Whether you’re moving, repairing, or storing your chair, following this guide helps you avoid damage and ensures a smooth process from start to finish.
If you want, I can also:
- Optimize this content for featured snippets
- Add structured FAQ schema
- Customize it for moving, repair, or storage intent